I may have made a few tentative bids on eBay this morning for a Mac Plus.
I did, in fact, do so.
I may have made a few tentative bids on eBay this morning for a Mac Plus.
I did, in fact, do so.
For the button, I’ve found this interesting guide:
http://mnpctech.com/guide-to-wiring-bulgin-vandal-resistant-switches-for-computers.html
I think I can adapt it to use something like this as the switch:
Which will be suitably chunky-looking for some 1980s (1990 for the Classic) tech.
Are these the ones which have a second circuit to power a glowing lamp inside? If so, DO IT. Nothing says professional hack job like glowing push buttons 
If it’s good enough for Star Trek TOS, it’s good enough for 2016 
They should, yes.
So… Waiting for parts and time.
I was digging up the docs for the LCD display and wondering if I should look at pulling the required power (12 volts) off the power supply or motherboard instead of messing with a separate power brick.
The docs for the LCD controller are available online.If you look at page three there’s a pic of the board, and page 9 has the pinouts of the connector… but what kind of connector is it? And is there a pre-built cable to do what I need or is there any easy way to make one?
If you mean the power connector, it looks like a regular negative-centre round power plug, which you can buy from component stores. There are several (seven, I think) common sizes for them (diameter and length variances) so you’d have to double check or take along the existing power brick and visually compare them.
You could technically chop the monitor end of the power cable off, and then split the resulting wires to the 0 (black) and +12 (yellow) rails in a Molex connector.
Nah, there’s an on-board connection at C16 I think I could use if I new how. I think it’s making it somewhat similar to how the panel would work in a laptop, as it’s got power, ground, and two pins for adjusting the backlight and such. I’m hoping if I can use this it’ll basically make the panel auto-on easier, which is a minor convenience. Also saving a power brick.
I’m going to have to re-house the whole assembly. I’ve been doing my test fits without loading the motherboard with processor, cooler, RAM, cables, etc… Which hid the fact that even my lower-profile cooler is going to overlap the power supply with the current layout. And my test cuts mean I can’t relocate the power supply without ugly consequences.
So, pretty much on-hold until eBay puts up a suitable donor. I don’t want to remove a working device for this, so I’ms ticking to ones sold for parts… if the logic board is clean I’ll at least eBay that back to recoup some costs. 
I think the Mark II is going to have the power supply vertical. This will require drilling some holes in the side of the case for venting, so I’m playing with patterns for that. If it comes out looking like crap, I’ll try for a “big circle” and get a fancy vent cover to cover it up.
The plus side is I guess this means it’ll be pushing the heat out instead of just letting it go up into the case. Bad side is I need to do some minor reengineering with the SSD holder and such. It’s also an opportunity to fix something I wasn’t thrilled with, which is the support I added for the video card, which I’ll look at and need to replace with a non-conductive bracket.
Ahh I see what you mean with the connector. If you’re right, and it looks like you should be, then yes that would be an ideal situation!
If you’re going to have to create venting holes in the side of the compact, then you could pick one of the models that already has such an aperture; several of the later models had a speaker grille on the left of the machine if I remember correctly, which might serve you well (though it would mean mounting the motherboard on the right instead).
There’s an SE for sale nearby to me for parts but when I asked how much shipping would be to the US at the Post Office yeah… yeah no it was retardo dollars much. It would be cheaper for me to buy a working Plus and Profile and enjoy those myself!
Who else is buying up all the old, cheap “parts only” Macs off eBay?
It might take a couple weeks to get a new one. Almost got a Classic II, which wouldn’t be idea, but would be appropriate as that was my first computer, at least in the sense that it was the first machine I really got to make my own.
I did get some metal track in for my reengineered SSD bracket mounts. I had a slightly hacky mounting system made from some picture-hanging brackets and sheet acrylic I can replace by just using the channel to hold one or two of the brackets, Worst case, if one one bracket will fit I’ll have to suffer with only two SSDs.
I’ll just give the whole project a week off to look for new host machines.
On the plus side, the wait gives em time for the switches I ordered to come in on a slow boat from China.
If you have an old erector set laying around, those parts could be useful, too. Remarkably light and sturdy.
Oh of course! Meccano! Why didn’t I think of that?
Got a Mac Plus in over the weekend… And now to start stripping and converting it.
It’s probably for the best. Turns out my LCD panel mount had some glue-related faults, so needs to be re-engineered a bit, anyway.
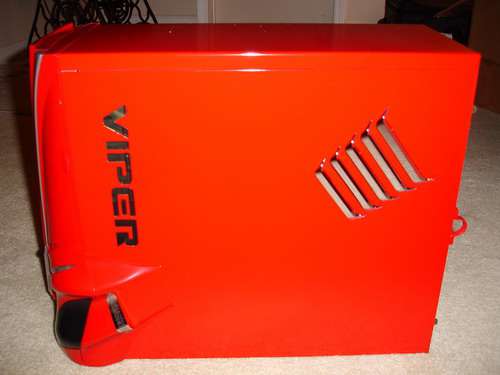
Got the Plus out today. It’s arguably nicer than the Classic I was using, as far as general shape:

Clean case, very little yellowing.

You can even see the signatures inside of the orgional team that was used for the internal mold dies through the SE era or so:

Going to have some interesting “features” and challenges. The drive slot should make putting a USB into it very easy… I might put a second in the brightness knob unless I think of something better to do with it.
I’m also working on the power button. The instructions I linked to earlier were for a four post switch… These have five Hopefully I can use them. They’ll fit in the existing keyboard interface cutout with minimal work.
I think I’m going to focus on the back panel bits first, though. I need to run by the store as I’m doing the internal mounts a bit differently using nylon spacers instead of metal L-Brackets in some key places. This is mainly to shave space, but may be good for electrical reasons. Also, I think it’ll help keep the cutting to the already rough rear view where the power button and battery holder were.
I heard someone say that Scotch-brite pads might remove the yellowing, but I’m dubious. If I was going to try it, I’d only use the blue ones and test first in an inconspicuous place, but since it is often caused by exposure to fluorescent lights, it might be difficult to find an inconspicuous place that has yellowed. Ha!
I took a cleaning wipe to it and it’s really nice. I was a little worried it was shipped as a “smoker’s surprise”: Wrapped in plastic in a box. Half expected to get my nostrils blasted, but this looks like it’s been stored in a box for a few decades. Only real issue I saw (it was bought as DOA) is the battery (which is actually accessible) had leaked and gotten nasty, but easily cleaned up.
I need to do some research tonight and tomorrow on wiring the button, but I think on this attempt I may end up focusing on the back piece first, then worry about the front bezel. It’s mostly a solved problem aside from a couple minor issues and deciding what to do with the brightness knob (if I was more clever I guess I could put a fan control in there, but I think a USB is more practical).
The Plus front bezel has a larger floppy slot, which should make mounting a USB much easier.
Oh: Minor benefit I think @CaffeinatedNoms hinted at earlier: The Plus case has a lot more shielding attached to the plastic. Probably not a bad thing (and my motherboard has an external WiFi antenna, although the box will most likely be on Ethernet anyway because I trust wires.
Got some cutting and gluing work in today. For the MkII, I’m focusing not he back half of the case at the moment.
One ‘innovation’ is replacing the old drive mounts with something that works better and is more pleasing to the eye. I bought some C-channel that I can slide the HD holders into, which I will then glue onto the side of the case. This replaces a flimsier set of picture frame mounting brackets.
Of course, this was more complicated than needed to be. I ordered the C-channel from Amazon but did so from work and was eyeballing things. So, wrong size.
I then ordered another c-channel, which was the right size, but needed to trim it down.
So my first thought was the DIY’ers friend, Señor Dremel. I was worried this would be an ugly cut, and I’ve had issues with cutting blades fragmenting explosively in the past. I then considered getting a blade for the mitre saw, but I read that might mess up the saw.
I even looked at local-isa Makerspaces, which si something I should continue looking at. But they weren’t exactly close anyway.
Then I realized that hacksaw blades are really cheap. Got a blade intended for cutting metal, had the cuts done in about 20 minutes.
I am also experimenting with that ‘Sugru’ stuff to try making end caps for these pieces. At worse, something to cover the sharp bit on the side I cut with the hacksaw, but I’m hopeful I may make some caps that can keep stuff in place.That’s something I’m looking at: making sure the power supply and such don’t bounce around too much.
Next step is letting some glue dry, then prepping and cutting the two or three big holes in the back of the case that need to be cut. (I think I’m counting the video card as a separate hole, but it’s essential an extension to the main motherboard access hole.)
This project isn’t dead, by the way. got distracted by a quick little project involving a Raspberry Pi and Halloween that has a hard date to be ready, but fiddled with it a bit this weekend.
My delays are a mix of my own current mental state (I’ve been a bit out of it) and my fear of putting holes where I don’t want holes and screwing the whole thing up.
Still, I did some test drills this weekend: Drilled holes well within the material I need to remove so I can check alignment and then remove small bits as needed. I might have done some cutting, but I really should do that outside for ventilation, and the 4th was rainy all day here. Not operating electric cutting tools in the rain.
I’m wondering if I should get a large clamp (would need to be the ‘height’ of the case) that I can hook on and use as a guide for the Dremel-Router cutting assembly. Might help keep some cuts cleaner.
The side hole is also still up in the air a bit. I definitely need to add one to vent the power supply. I’m not sure if I should try cutting a precise pattern of holes or jsut get a 5" hole saw bit and put a single big hole in, then bolt a screen over it.
Single holes look more ‘stock’ such as it is. But that means I need to get a bunch of holes right. I have a possible trick here in that I got $Wife a dremel stand that can be used as a baby drill press, so at least they’ll all be straight, but that limits the holes to a size the dremel can do. I might end up using that to drill small holes to act as pilots for the regular hand drill.
On the other hand, cutting a big hole (and a few bolt holes) might provide better air flow.It’ll look worse, and I have no idea how well an expensive hole saw will do on plastic anyway,
By the way, cutting this plastic is weird. I removed a couple projecting bits I don’t need with the Dremel this weekend, and found that it cuts pretty smooth when done properly, but at times it’s like cutting butter where the material ‘melts’ out of the way. The Mk II’s older case is a bit tougher as I feel like it’s a bit thicker and has the metalized interior surface.
$Wife thinks it is sad that I have to chop through the design team’s signatures.
Oh, and thanks to walking through a section with a friend I’m revising my Drive mounting solution again.
My recent innovation was using two 8" lengths of aluminum C-channel material that the SSD brackets would slide into. This worked, but I realized I’d lose access to the important SSD power/data connections. Those are important, right? I might have been able to make it work by sacrificing the ‘lower’ space on each bracket, but I prefer keeping ti available in case I need 3-4 drives in the case in the future. Maybe something like:
Got some mirror clips that should fix this issue. SSDs are great for projects like this, I feel. They’re a lot less sensitive to environmental concerns and don’t act as big spinny masses in use.
I’m also looking at something my early designs overlooked, which is adding some bolt points in to keep the power supply and motherboard assembly locked in place.
My ‘normal’ schedule is disrupted for the next couple weeks, so time is going to be limited again… but next weekend looks like I should be able to put a few hours in if noting comes up. I’ve basically decided that since the front piece kinda-sorta worked in Mk 1, I’ll focus on the back section for Mk 2, then circle back when that’s functional (and hopefully booting).
What about slots instead of holes?